


You are looking at the documentation of a prior release. To read the documentation of the latest release, please
visit here.
Install Stash Community Edition
Stash Community edition is available under AppsCode-Community-1.0.0 license and free to use for both commercial and non-commercial purposes. It comes with all the basic backup functionalities. However, it lacks some advanced features such as Database Backup, Auto-Backup, Batch Backup, and Local Backend support, etc. compared to the Enterprise edition. A full features comparison between the Stash Community edition and Enterprise edition can be found here.
To use Stash Community edition, you can grab 1 year free license from here.
Prerequisites
- Kubernetes version: Stash is compatible with any Kubernetes cluster with version
1.16or later. - Extended API server: Your cluster needs to support Kubernetes extended API server.
- Webhook support: Your cluster must support Kubernetes validation and mutation webhooks.
- RBAC permissions: Stash operator needs a few RBAC permissions on your cluster. You can find the list of the required RBAC permissions here.
- Installing on GKE cluster: To install Stash on your GKE cluster, please check the requirements here.
- NFS volume: If you are willing to use NFS volume as a backend, you need to customize the Stash installation like here.
Get a License
In this section, we are going to show you how you can get a 1 year free license for Stash Community edition. You can get a license for your Kubernetes cluster by going through the following steps:
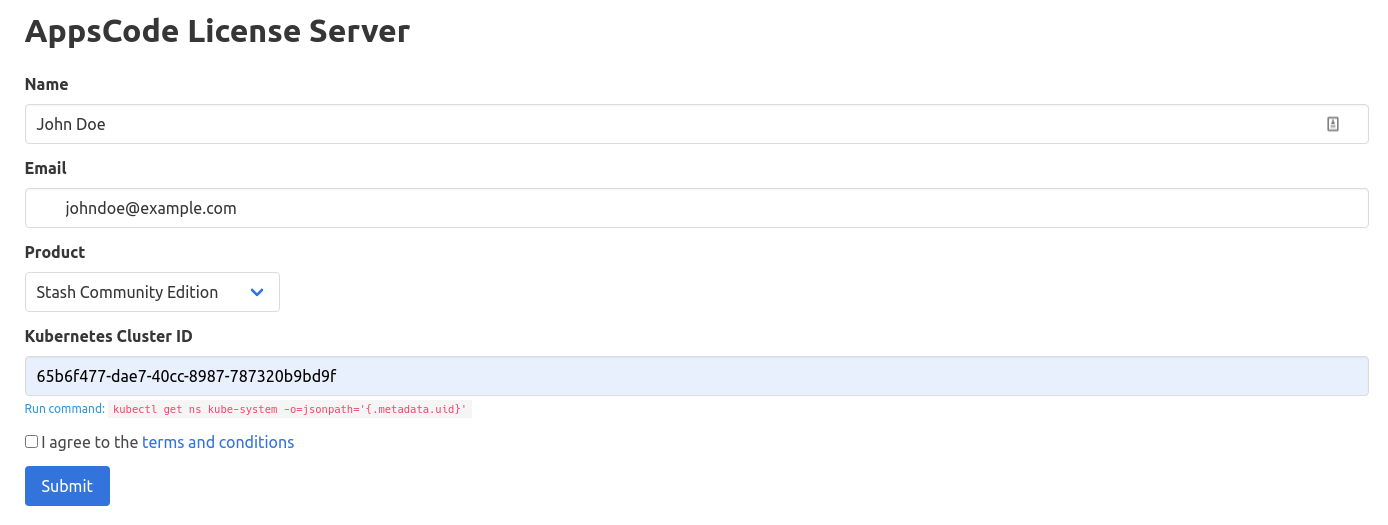
- At first, go to AppsCode License Server and fill up the form. It will ask for your Name, Email, the product you want to install, and your cluster ID (UID of the
kube-systemnamespace). - Provide your name and email address. You can provide your personal or work email address.
- Then, select
Stash Community Editionin the product field. - Now, provide your cluster ID. You can get your cluster ID easily by running the following command:
kubectl get ns kube-system -o=jsonpath='{.metadata.uid}'
- Then, you have to agree with the terms and conditions. We recommend reading it before checking the box.
- Now, you can submit the form. After you submit the form, the AppsCode License server will send an email to the provided email address with a link to your license file.
- Navigate to the provided link and save the license into a file. Here, we save the license to a
license.txtfile.
Here is a screenshot of the license form.
You can create licenses for as many clusters as you want. You can upgrade your license any time without re-installing Stash by following the upgrading guide from here.
Stash licensing process has been designed to work with CI/CD workflow. You can automatically obtain a license from your CI/CD pipeline by following the guide from here.
Install
Stash operator can be installed as a Helm chart or simply as Kubernetes manifests.
Using Helm 3
Stash can be installed via Helm using the chart from AppsCode Charts Repository. To install the chart with the release name stash:
$ helm repo add appscode https://charts.appscode.com/stable/
$ helm repo update
$ helm search repo appscode/stash --version v2022.06.21
NAME            CHART VERSION         APP VERSION         DESCRIPTION
appscode/stash  v2022.06.21    v2022.06.21  Stash by AppsCode - Backup your Kubernetes native applications

$ helm install stash appscode/stash          \
  --version v2022.06.21                \
  --namespace kube-system                     \
  --set features.community=true               \
  --set-file global.license=/path/to/the/license.txt
To see the detailed configuration options, visit here.
Using YAML
If you prefer to not use Helm, you can generate YAMLs from Stash chart and deploy using kubectl. Here we are going to show the prodecure using Helm 3.
$ helm repo add appscode https://charts.appscode.com/stable/
$ helm repo update
$ helm search repo appscode/stash --version v2022.06.21
NAME            CHART VERSION         APP VERSION         DESCRIPTION
appscode/stash  v2022.06.21    v2022.06.21  Stash by AppsCode - Backup your Kubernetes native applications

$ helm template stash appscode/stash          \
  --version v2022.06.21                \
  --namespace kube-system                     \
  --set features.community=true               \
  --set global.skipCleaner=true               \
  --set-file global.license=/path/to/the/license.txt | kubectl apply -f -
To see the detailed configuration options, visit here.
Verify installation
To check if Stash operator pods have started, run the following command:
$ ❯ kubectl get pods --all-namespaces -l app.kubernetes.io/name=stash-community --watch
NAMESPACE     NAME                                     READY   STATUS    RESTARTS   AGE
kube-system   stash-stash-community-66b86d9647-kcncc   2/2     Running   0          2m6s
Once the operator pod is running, you can cancel the above command by typing Ctrl+C.
Now, to confirm CRD groups have been registered by the operator, run the following command:
$ kubectl get crd -l app.kubernetes.io/name=stash

NAME                                      CREATED AT
backupconfigurations.stash.appscode.com   2020-08-24T08:20:54Z
backupsessions.stash.appscode.com         2020-08-24T08:20:55Z
functions.stash.appscode.com              2020-08-24T08:20:55Z
recoveries.stash.appscode.com             2020-08-24T08:20:54Z
repositories.stash.appscode.com           2020-08-24T08:20:54Z
restics.stash.appscode.com                2020-08-24T08:20:54Z
restoresessions.stash.appscode.com        2020-08-24T08:20:55Z
tasks.stash.appscode.com                  2020-08-24T08:20:55Z
Now, you are ready to take your first backup using Stash.